Tired of the rain, snow or cold weather keeping your from enjoying the game that you love? Tired of your game taking until June to start shooting the scores you were at the end of the previous season? Then I just might have the perfect solution for you to play golf 365 days a year. A golf simulator has brought a great deal of game improvement and entertainment to my life. I can now spend time with family and friends having fun and enjoying my game.
In the early spring across many parts of the world, we sit and wait for the weather to get just nice enough to play a round of golf. We check the weather each day, hoping that it will reach 35 to 40 degrees and can get outside to see the ball fly and to play some golf. We are thrilled to get out and then are hit with the reality of the current state of our golf games, rusty and not performing at peak levels.
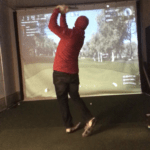
I made the decision after much research to build myself a golf simulator in my garage. As a result, my game has improved and the winters are much more bearable. Also, for the first couple actual rounds of the year, I am now able to strike the ball crisp and score well. Being able to play golf 12 months a year at anytime of the day, regardless of the weather is truly amazing and a ton of fun!
Rain or Shine Golf has some great deals on Golf Simulator Packages
So one might ask just how much does a golf simulator build cost? The simple answer is anywhere on average from 1K to 10K – there are many variable and options. I have provided the details on building the 1K dollar golf simulator in a previous post. Everyone has a different budget, but at the end of day we all want to play as often as possible. There are many good options in today’s market compared to 10 plus years ago. You will not be disappointed, just make sure you know what portions are most important to you. For me it started with the SkyTrak and The Golf Club (TGC) software as the most essential items. Click Here if your budget is $1000 or less.
My experience is that a golfer can build the ultimate golf simulator for just under $7,000. For this price you will get a quality golf simulator, impressive looking enclosure and impact screen, quality hitting mat HD projector, and a Gaming Level Computer, complete package here. Below I will break down the purchases I made in each of the categories listed below and explain the why behind each decision:
- Golf Simulator/Launch Monitor ($3000 Budget – includes cost of software)
- Enclosure/Impact Screen ($1200 Budget)
- Hitting Mat ($500 Budget)
- HD Projector ($800 Budget)
- Computer ($1200 Budget)
The Total with a budget in the range listed above would be $6700.
Read all about our recommended products.
Ready? Here we go!
Golf Simulator/Launch Monitor ($3000 Budget, includes Golf Software)
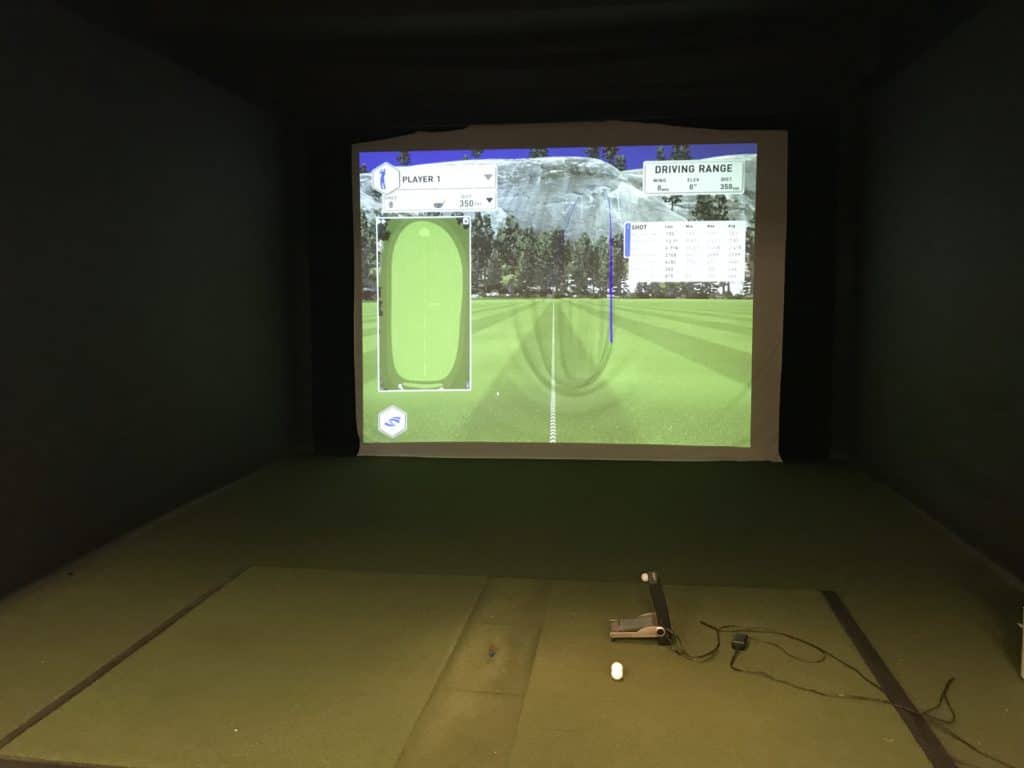
After about a year of research and waiting for my budget to come together, I finally decided on the SkyTrak Golf Launch Monitor. The two options came down to the SkyTrak and the ProTee, which is a very impressive product in its’ own right. The ultimate reasons for my decision came down to ease of use, space and the righty/lefty play.
While the ProTee handles both righty and lefty play at the same time with ease, I was concerned about the overall space that I had. I was dealing with 12 feet of width in my garage and my sons are both left handed. I worried about as they got older having enough space to take full swings with our drivers. One last item that really stood out is that the SkyTrak is a simple setup and ready to go right out of the box after being charged. There is little to no tweaking for years to come and you simply set it in place and you are off to playing some amazing golf courses throughout the world.
One of the major benefits of the SkyTrak is the versatility and being able to move it around on the mat. This has helped prolong the life of my mat and the impact screen. The SkyTrak has many benefits in my opinion.
First, you are able to take it with you to the driving range and utilize the data it provides for game improvement opportunities. The SkyGolf 360 website setup is impressive and very easy to use and understand. Taking this data and applying it to your game can be a difference maker.
A second major benefit of the SkyTrak is the ability to use different software with it. I personally selected the The Golf Club (TGC) software (full review here), which has stunning graphics and offers over 150,000 courses including many in the top 100 throughout the world. The combination of the SkyTrak and the TGC software will leave your golfing friends and family envious of the golf simulator space you have been able to build for under $7,000. I play many of the top courses in the world. To read about my 10 favorite TGC courses use the link above.
Tip: Make sure you buy a quality software to run with the SkyTrak. I have left around $1000 for you to spend money on the software. One major benefit of the SkyTrak is that there are a handful of options on the market. Make sure you check them out and don’t cut corners here.
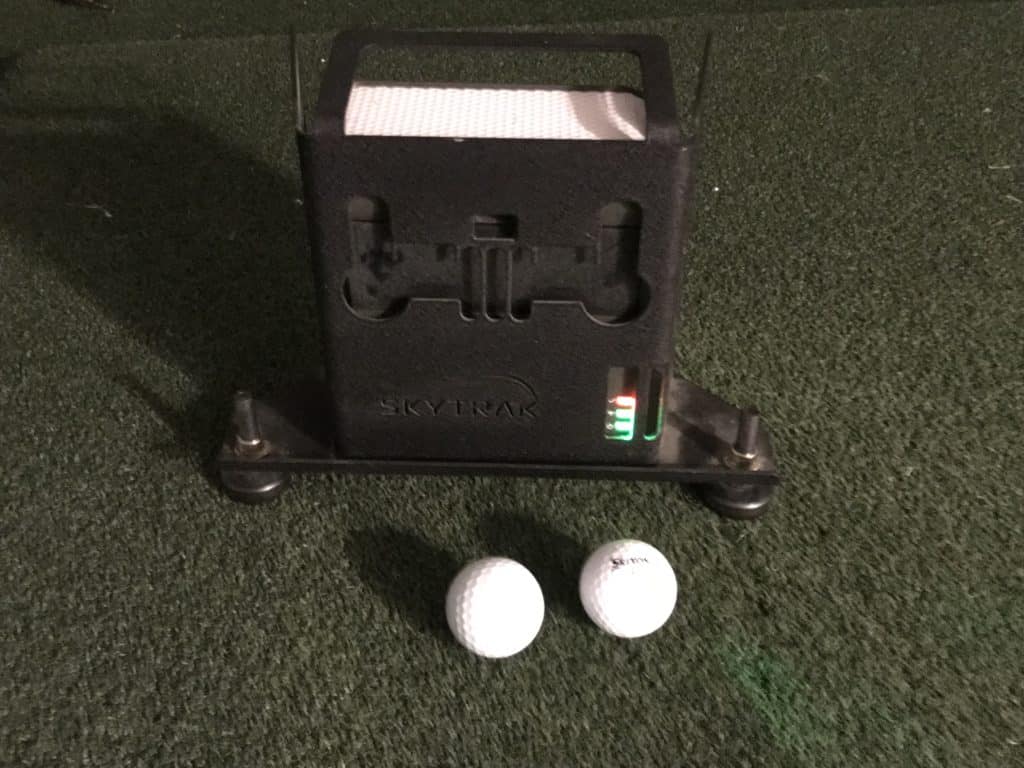
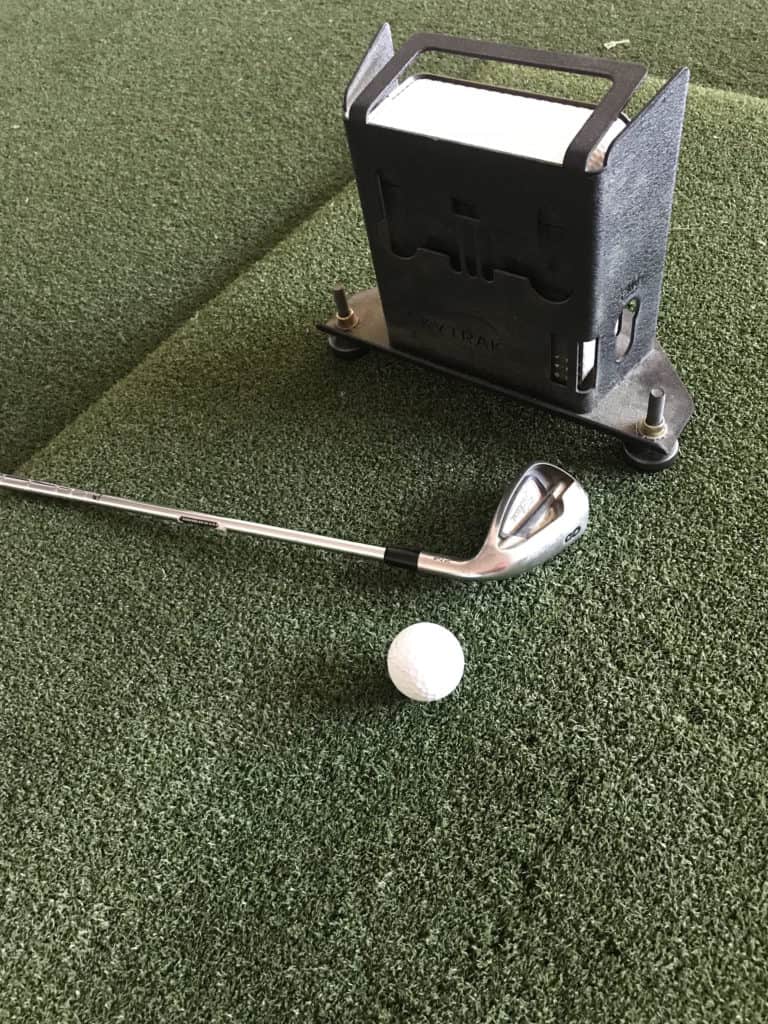
Tip: An additional purchase I would recommend to use up some of your remaining $300 is the SkyTrak Protective Metal Case. This addition is a major requirement if you are entertaining your golfing friends or family who might not be highly skilled. The last thing you want is a shanked shot to you ruin your launch monitor, which is the most significant investment. The metal protective case is of high quality and does not impact the overall performance of the SkyTrak. It comes with balancing legs on it that can raise or lower the level of the SkyTrak. I have found that the SkyTrak works best when it is as close to the ground as possible.
To read more about the SkyTrak visit a link below:
My Top 11 Reasons to Buy the SkyTrak
SkyTrak Golf Review (Comprehensive Overview)
Enclosure and Impact Screen ($1200)
I would say this was one of the biggest items that I spent time researching. Ultimately, I purchased an Enclosure and Impact Screen combo with AllSportsSystems. The enclosure I purchased is a 9Hx12WX5D. This provided enough width that it looks of high quality and allows for both righty and lefty golfers to play and the 5 feet that it comes out away from the back wall on the sides has stopped several errant shots over the years and protects your space and keeps everyone safe.
The AllSportsSystems website includes many options for your combo bay. One really nice thing about the enclosure is that is also comes out 5 feet at the top. This helps stop the lob wedge shot if hit above the 9 foot screen and once again keeps the ball from flying around your garage, basement or room where your golf simulator is setup.
I upgraded my impact screen to a HD screen, which is supposed to make the graphics really pop. While I have nothing to compare it to at this time, I know that the graphics are stunning and it looks great. If you go with the TGC software as your game software, it has some amazing graphics and real life looking visuals. I would recommend the HD impact screen if you are going with the TGC software or something like the E6 software option. I am not sure if the upgrade is worth it if you are purchasing a lesser quality software for your golf simulator.
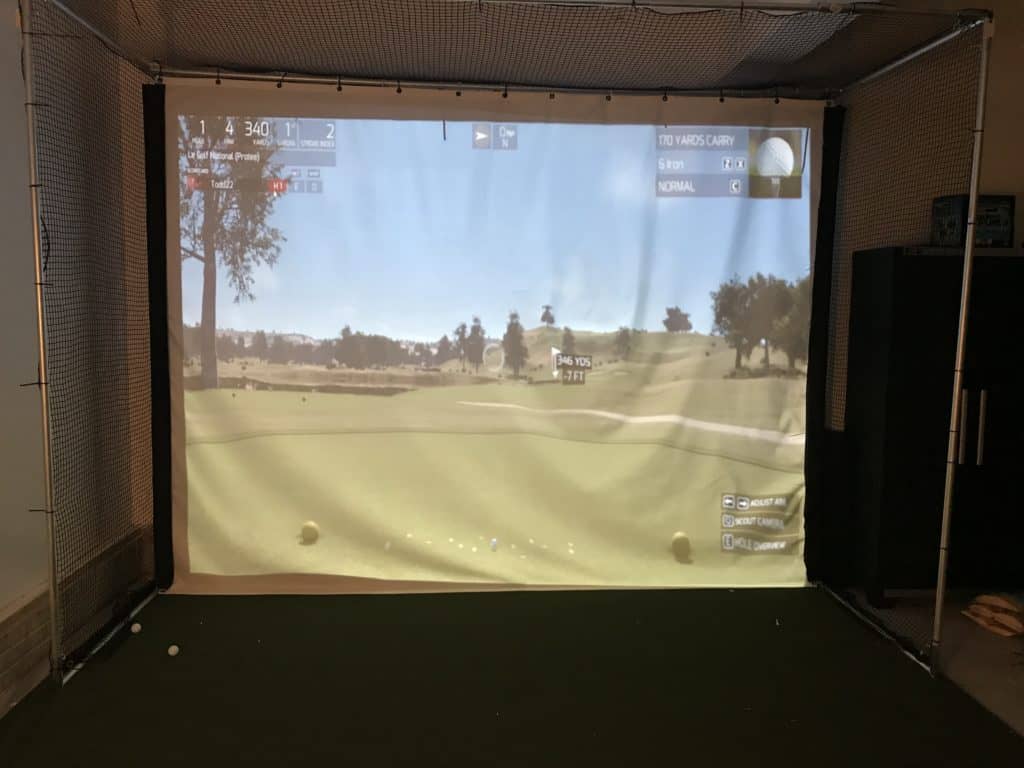
Tip: Make sure you maximize your space and get as wide of an enclosure as possible. Sometimes the 10 foot wide enclosures can take away from the overall feel of the simulator, but if that is the only space you have, you will still get great enjoyment and game improvement opportunities. However, if you have 16 feet of width – USE IT! A 16 foot wide simulator space looks incredible and matches up perfectly with many of the projectors available in today’s market. Tee 16:9 aspect ratio will look brilliant!
At the end of the day, the enclosure is vital as it keeps you safe and the impact screen is just as important as it can enhance your graphics and truly make your golf simulator space amazing!
Recommend Products – Enclosures and Impact Scree and more.
Hitting Mat ($500 Budget)
I ended up purchasing the TallTurf Dual Stance mat through AllSportsSystems. The mat features a nice wide area to utilize and real tees are used. Three areas of concern for any mat include:
- Longevity
- Real Feel
- Easy on the Hands and Writs
You want a mat to respond like an actual golf shot and reward the crisp shot and penalize the shot where you did not hit truly strike the ball clean. The longevity of the mat is essential as you want your investment to last. Also, the mat has to be soft enough that if you are hitting a lot of shots in a week that you don’t start developing issues with soreness in your hands or your wrists.
There has been great strides made in the quality of the mats both from a longevity option, being able to use real tees and not beating up your body. I have been very pleased with my purchase and after over 300 rounds of golf and many range sessions, the mat has held up great and with the SkyTrak.
Tip: I am able to move the SkyTrak or the mat around to ensure I am not always hitting from the same spot, which has increased the life of the mat and my impact screen.
The other mat that I considered is the TrueStrike Mat at Raine or Shine Golf. I have read many positive reviews on this options. It is a similar price range.
HD Projector ($800)
There are two different options for projector placement. Do you want to place your projector on the ground and protect it with a cover or do you want to mount from the ceiling? Regardless of your decision, you will more than likely need a short throw projector or one that is able to meet the need to be projected from 4-10 feet from the impact screen. You want to have a clean, crisp image.
There are plenty of sites out there where you can enter your screen size and and look at the distance you will want the projector from the impact screen. Keep in mind if the projector is too far back, you might cast a shadow. I have my project mounted just slightly ahead of where I hit up the ceiling. I invested in a mounting system that is able to move the projector back and forth by several feet. This provided me some versatility when mounting the projector. I am pleased with the location and image of my Optoma projector. Many in the golf simulator world speak highly of the BenQ models.
If you decide to place it on the floor, remember to protect it.
Computer ($1200)
The key here, especially if running The Golf Club (TGC) software is to ensure that the requirements below are met. Keep a close eye on the graphics card and ensure that you have the selected a computer that meets these requirements. This will help ensure that your TGC software in connection with your SkyTrak runs smoothly without issue. I ended up selecting an HP computer that meet the requirements on the high end. I wanted to ensure that as the software progress my computer does not become quickly outdated. To date, the computer has handled the software fantastically and I have had zero issues or concerns.
I purchased a model similar to this HP Omen through Amazon.
Tip: The graphics card in a Desktop and a Laptop differ even if the graphics card is the same model. A Desktop graphics card performs at a higher level.
Minimum:
- Requires a 64-bit processor and operating system
- OS: Windows 7 64 bit, Windows 8.1 64 bit, Windows 10 64 bit
- Processor: Intel Core i5-760 @ 2.80GHz or equivalent
- Memory: 4 GB RAM
- Graphics: AMD Radeon HD 5770 or NVIDIA GTX 650 with 1GB video RAM
- DirectX: Version 11
- Network: Broadband Internet connection
- Storage: 12 GB available space
- Sound Card: DirectX 11 compatible
Recommended:
- Requires a 64-bit processor and operating system
- OS: Windows 10 64 bit
- Processor: Intel Core i5-4670 CPU @ 3.40GHz or equivalent
- Memory: 8 GB RAM
- Graphics: AMD Radeon HD 7850 or NVIDIA GTX 660 with 2GB video RAM
- DirectX: Version 11
- Network: Broadband Internet connection
- Storage: 12 GB available space
- Sound Card: DirectX 11 compatible
Summary
If you go with these options, you will not be disappointed. The overall quality of the SkyTrak is impressive for the price point. Any enclosure between 12-16 feet will bring the game to life and please ensure that you purchase a quality impact screen that will not only project the image in high definition, but will last a long time.
While this can be a stressful time, once you make the final decision and can play golf 365 days a year, you will not regret your decisions. I spent a great deal of time reading and researching and all of these options above worked out great and provided me what I was looking for.
Related Questions
What adjustments would you make if you only had a $5000 budget?
I would look for a minimum level computer and save several hundred dollars. I would also look for a cheaper enclosure and impact screen. I would also reduce the size of my hitting mat to a 4×5. I appreciate the 4×9, but it really isn’t needed. Ultimately, I would remain with the SkyTrak and the TGC software as I believe these are the most essential pieces to the setup.
What if I have extra money to spend?
I would look at expanding the total width of the golf simulator space and go with a 16 foot wide bay. I would also look to add items like a television or cameras to help bring other entertainment and game improvement tools into the space. I would also spend money on underlayment that sits under your hitting mat and looks like a golf turf, just something much thinner than your hitting mat. It will also help stop the golf balls from bouncing around in your space if you do not have carpet in that space. I would also add the blackout options on the enclosure, while not necessary, it does provide a pretty cool look.
How much space do I need for a Golf Simulator?
You need a minimum of 10 feet, but anywhere between 12 and 16 feet in width is ideal. You will also need at least 9 feet in height and will want about 16 feet in depth. More details on space needed.
Is the SkyTrak realistic?
From the different test of videos I have viewed on Youtube, I would say that it is typically within an accuracy of 1-2 yards of simulators or launch monitors that are sometimes 3-5 times the price of the SkyTrak.
Can I get financing for my golf simulator build?
Yes, there are 8 quality options that I highlighted in this post. Read more.
What golf ball should I use with my golf simulator?
I recommend two options and provide the why in this post. Read More.
Is a Golf Simulator worth the investment?
For me, it has been worth it. I have now played over 300 rounds of golf and have spent a great deal of time working on my game and having fun. I spend quality time with friends and family or just some simple quiet time after a long day at work. I find that I use my simulator 12 months a year because the biggest barrier to playing golf for me is time. Even in the summer months, on the days I cannot play regular golf, I find time to hit in my garage golf simulator build.
With the demands of life, being able to head to the garage to decompress for 20-40 minutes and have some fun is well worth it. With the TGC software the access to many of the top courses has been amazing. I love playing the best courses in the world as I work on my game and have fun. I enjoy playing the course that the pros are playing that week and challenging myself with the same shots they are being challenged with! Ultimately this is a personal decision, but from my experience, the experience has been well worth the investment! I do not regret it one bit!
Read more about our golf simulator experience, here.
I am an amateur golfer on a journey to get better, enjoy the game as often as possible and share my passion and knowledge with others. I have coached high school golfers at a high level and have a great passion for the game and want to give back. I enjoy learning about the golf swing and am currently studying to be a certified professional golf instructor. Join me in our journey to get better everyday. Thank you for reading!