The topped shot in golf is caused by an inconsistent low point in the swing as a result of numerous potential swing faults. These swing faults include: the center of the shoulders and hips are too far back or the elbows pulling apart resulting in an early unhinging of the wrist.
Are you new to the game or have a revitalized energy to get better?
Have you been struggling with inconsistent contact? Tired of playing the same old inconsistent golf?
One time you hit the ball thin, the next time you hit it fat?
Well, I am glad you are here because I want to help you understand the issues causing these types of shots.
Golf can be a complicated game, but with some basic understanding of the different faults in a swing, golfers can make progress each and every month and get better.
Too many golfers settle for their current status, but the goal is to practice the right drills and then score better when you get out on the course.
Here at golfjourney365, we love the journey to get better every day! We love the mental and physical challenge that golf provides us with the ability to enjoy our journey with golf!
Probably the most common mis shot for higher handicap players is the topped shot. It is shot that many fear because if there is a water hazard in front, the ball could easily end up in the water.
So let’s dive right in and help you out!

What Causes A Topped Shot in Golf – Overview
Below, I will dive into the 2 causes of the topped shot in golf and provide a great drill for each of these causes and faults.
The goal should be to understand the swing faults and get to work on the drills to train your golf swing to respond in the proper sequence and patterns, resulting in better contact.
However, before we dive into the causes of the topped shot in golf, let’s first make sure we understand the fundamentals of golf. I believe in these three fundamentals and you will see that by working on these fixes you are working on the 1st fundamental of golf.
Fundamentals of the Golf Swing
The Stack and Tilt Instructors said it best when they described what they believed were the fundamentals of golf. They explained it somewhat similar to this:
- Fundamental #1: The golfer’s ability to control the bottom of the golf swing. The best golfers will hit the ground in the intended spot, close to 100% of the time.
- Fundamental #2: The golfer’s ability to control the curve of the golf ball. The best golfers are able to start the ball to the right or left of the target line and have the ball curve towards the target without the ball over curving past the target.
- Fundamental #3: The golfer’s ability to have enough power to play the golf course. This means they are able to hit the ball far enough to play the course in regulation.
You can reach your full potential with different golf stances, setups and alignments as long as your 3 fundamentals stay strong.
Don’t be scared to fully study all and experiment when you get the chance with each one to see what is best for your game. You might learn something from one setup that you can apply to the other.
For today, we will focus on the 1st fundamental, which if you reach a proficient level will eliminate topped and fat shots in golf for good!
You can utilize the three fundamentals above to assess where you are at with your game currently and then do a post assessment after you try out one or more of these approaches/methods to the golf swing!
You can revisit these three fundamentals frequently to measure your growth and to keep you on the right track towards reaching your goals.

Cause #1: The Center of the Shoulders and Hips Are Too Far Back
If the center of the shoulder and hips are too far back, too many variables in striking the ground in the same spot consistently becomes difficult.. You are now relying on timing up the release perfectly every time.
One time if you release early, the club will hit behind the ball, if you hold off the release, you will top the ball.
The Fix: Move Your Weight Forward
At your setup, make sure you have at least 55% of your weight on the front side. This will bring your centers forward and help you strike the ground in the same spot every time.
If your centers are moving back and then forward too much, you can have issues striking the ground consistently. Recall fundamental #1 and the importance of controlling the bottom point of the swing.
The Drill: The Low Point Control Drill
- Take some yard paint and patina a 1-2 yard long line.
- Setup with 55% of your weight on your front side.
- Try to hit the target side of the line and see how many times out of 10 you can do this successfully!
- Repeat this drill every day for a month, tracking your progress and your ability to to this successfully in trials of ten.
- You may need to start with half swing and progress to full swings.
If you are struggling, put more weight forward and work on keep your head still to help control the low point in the swing.
Cause #2: Elbows Coming Apart in Downswing (Chicken Wing)
When the arms start coming apart and the distance in teh elbows grow during hte downswing, it is difficult to control the low point of your swing. As a result, your wrists may unhinge early and strike the ground behind the ball or not unhinge and strike the top of the ball causing the topped shot in golf.
The Fix: Maintain Bend in Right Elbow on Downswing
Make sure you right arm doesn’t start to straighten until your left arm is parallel to the ground. This will help you have the proper release. When combined with the first fix, you will start to strike the ball more solid, eliminating the inconsistent contact and the topped shot in golf.
The Drill: L to L Drill
- Take a narrow stance
- With a wedge in hand, take the club back until your left arm is parallel.
- Go ahead and hit the ball working on striking the ball first and then the ground.
Here is Mike Malaska explaining the L to L Drill:
Some Additional Thoughts
You might find a bunch of other reasons online, but if you follow the first drill, you can get to the point of making the proper movement. What I best like about the first drill is that you are focused on completing a task. You aren’t trying to manipulate anything.
You can simply put your weight forward, keep your head still and work on striking the ground.
You can add a foam ball if you are pracicing in your back yard for a visual. Remember, the key here is to strike the ball before the ground. The bottom of the swing will be controlled where your weight is at impact.
If your weight is too far back your swing will more than likely bottom out before the ball causing the fat shot or the topped shot. These two misses are caused by the same swing fault.
There are other things to check such as:
- Proper club fitting.
- What are you are focusing on during the swing (Should be focused on a task or target).
Other than that, let’s start with these two drills and work on them. Once we get the contact down we can move onto the 2nd and 3rd fundamental in the golf swing. I can’t leave you right here without giviny rou some bonus tips on fundamentals 2 and 3.
Overall, the two drills above and the two drills below are drills you can come back to for the rest of your golf journey. They are focused on the fundamentals of golf and keep the the game simple for you!
BONUS DRILLS
BONUS Drill #1: Control your start line (Build a Stock Shot)
- Set up an alignment stick 6-8 yards down your target line in front of the ball.
- If you have one, set up a second alignment stick 2-4 yards right of that target line
- Go ahead and see how many swings out of 10 you can get the ball to start to the right of the first of the alignment stick. The goal here is to progress to 7 out of 10.
- Practice this drill everytime you hit golf balls.
The key to golf is being able to control your contact and your start line. Could you imagine a round of golf where you strike the ball solid and 7 times out of 10 the ball starts down your intended target line?
This is the ultimate in golf and helps you start to focus on your course management. You will gain confidence and the consistency that we all seek!
BONUS Drill #2: Increase your swing speed through overspeed training
- Check out SuperSpeed Overspeed Training Protocols
- Train every other day for 10-15 minutes.
- See a 4-6% increase in swing speed as early as the first training protocol.
The number one thing that has helped me gain significant distance is the SuperSpeed Training System.
This overspeed based system where you train every other day for about 10-15 minutes with different swing sticks can help you increase your swing speed by 5-8% which can be 20-30 yards. Who wouldn’t want an extra 20-30 yards. Plus it helps improve your mechanics.
SuperSpeed Golf – Use Discount Code Golfjourney365 for some savings!
The analytics are pretty clear on the importance of speed in the game of golf. Would you rather hit your approach shot from 130 yards of 160 yards? The answer is pretty simple!
We know that over the course of time, we will hit shots from 130 yards much closer than from 160 yards, whether we are an average amateur golfer, a scratch golfer, or a PGA Tour member!
The key is having shorter approach shots, so we can hit the ball closer to the hole and then make more putts! Speed is king in the game of golf! Make sure you check out SuperSpeed Golf!
My Secret To Golf Improvement
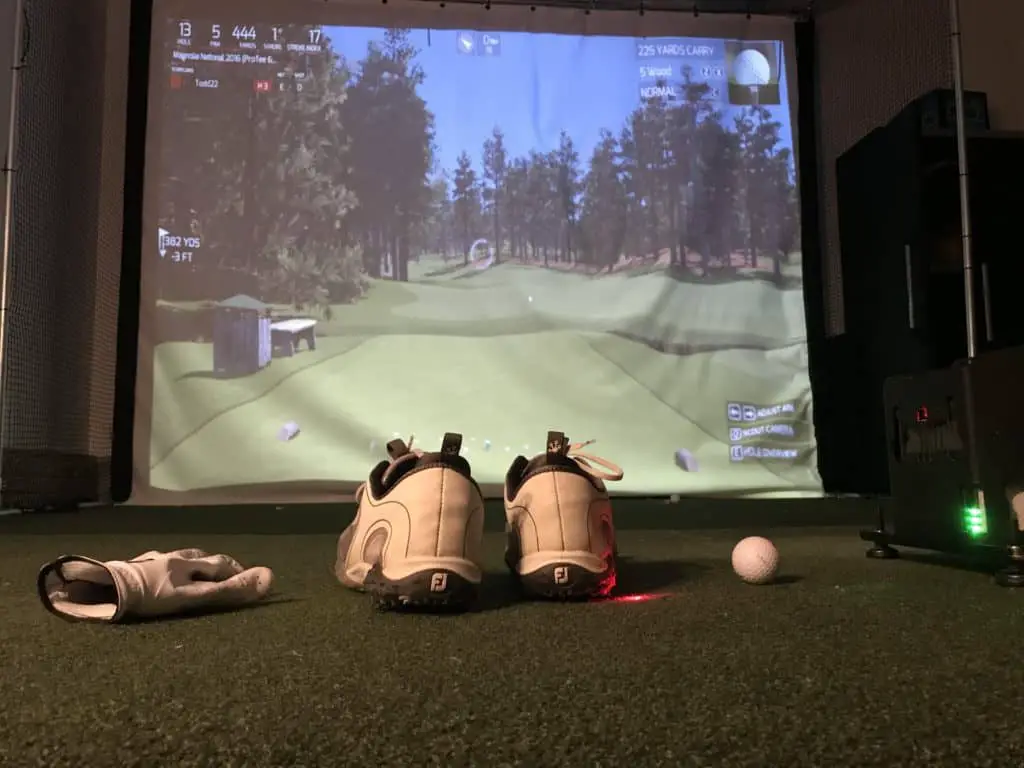
Let’s face it, in order to get really good at golf, we must practice frequently. About three years ago, I made the leap and invested in a golf simulator build for my garage.
I went with a SkyTrak Launch Monitor and the TGC software and can now play over 100,000 courses including Augusta, Pebble Beach, Bethpage Black, Whistling Straits. St. Andrews and many other of the top 100 courses in the world.
This golf simulator setup, which is more affordable that you might imagine, has been a game changer. I can now play golf everyday of the year regardless of rain, snow, cold weather or time of day. I can practice or play rounds of golf. I can stand in the 11th fairway at Augusta and with the auto-rewind feature I am able to practice my approach shots from various differences.
It is worth checking out through Rain or Shine Golf as they offer some incredible packages along with financing offers that are difficult to beat.
Some direct links to Rain or Shine Golf for pricing and financing:
Take Action – What You Can Do Today to Get Better
What does this mean for you? I believe in the following recipe to get better:
1 – Improve your motion in the golf swing by identifying a golf instructor. Here are some options:
Here is a list of golf instructors that we have reviewed:
2 – Train to swing faster and improve your swing speed. Here are some options:
Looking to gain more Speed and Distance in your swing. Two Options:
3 – Understand course strategy and work to break through your next barrier. Here is a series on breaking through:
We have provided guides on how to break 100, 90, 80 and 70. Check out more below, if interested.
4 – Practice Frequently
Did you know that I build a golf simulator in my garage and have played over 500 rounds of golf on my SkyTrak system? It has been a game changer and one worth checking out. Here are some of my other posts on golf simulators frequently asked questions:
- Is a Golf Simulator Worth It?
- How to Build a Golf Simulator?
- What is the Best Golf Simulator?
- Golf Simulator Accessories?
- How to Build a Golf Simulator for under $7000
- Top 11 Reasons to Buy a SkyTrak
- How to Build a Golf Simulator for Under $1000
- Why Build A Golf Simulator?
- What Space is Needed?
- Can A Golf Simulator Improve My Game?
- How Much Does A Golf Simulator Cost?
- Don’t Forget to Check out our 15 best golf swings of all time.